
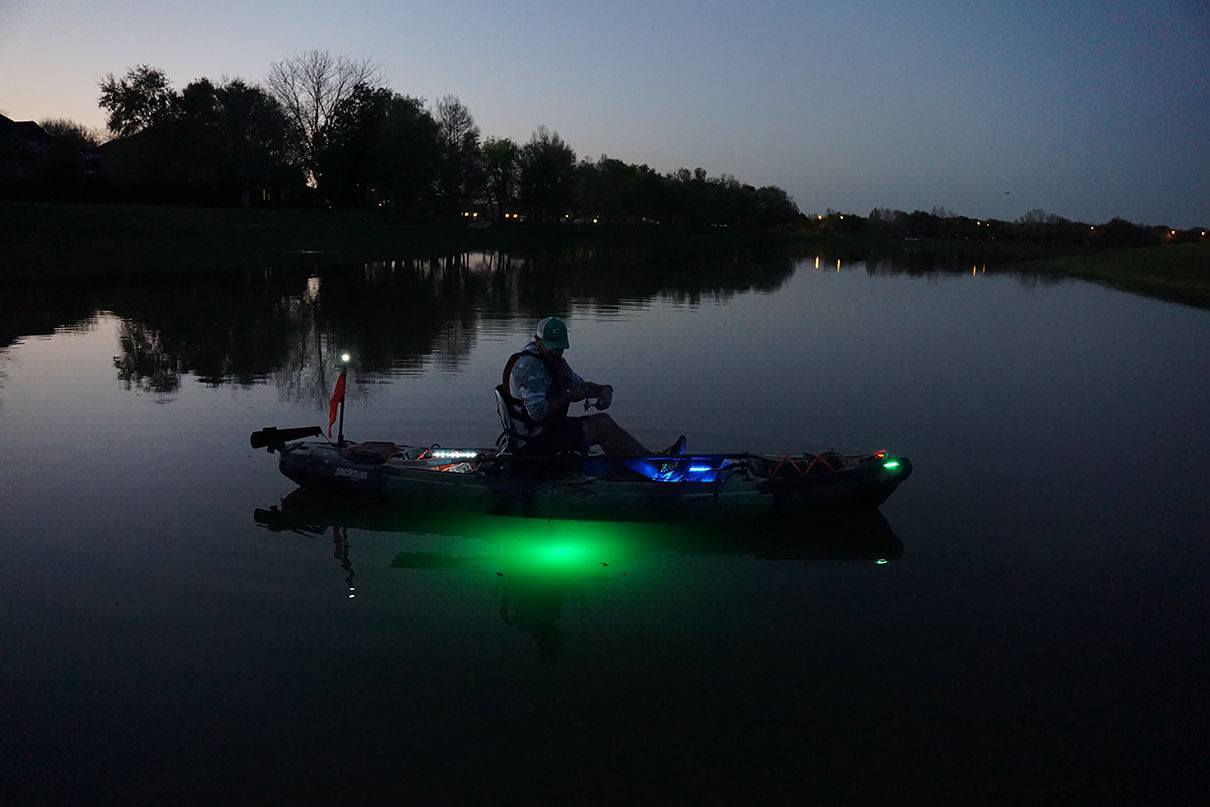
The Coast Guard requires paddle or pedal drive kayaks to display a white 360-degree navigation light after dark. Motorized kayaks fall under the same requirements as small motorboats: a white anchor light in the stern and red and green navigation lights in the bow. For most kayak anglers, Coast Guard lighting requirements are just the beginning.
To improve visibility and provide lights for rigging, I installed cockpit lights in my Jackson Big Rig kayak. To draw more fish to my kayak and further increase low-light visibility, I dangle a submersible light below the boat (check local restrictions on fishing lights). In total, I installed seven lights to my kayak. Connecting the batteries, controlling the power and managing the wires required a lot of planning and some special skills. Here’s how I installed a full array of lights on my kayak.
Light It Up: DIY Kayak Lighting In One Day
Tools
- Phillips screwdriver
- Drill
- 1/16” and 1/8” drill bit
- Heat gun
- Wire crimp
- Fish tape
Materials
- Red and green LED utility strip light
- LED flex light with mounting track
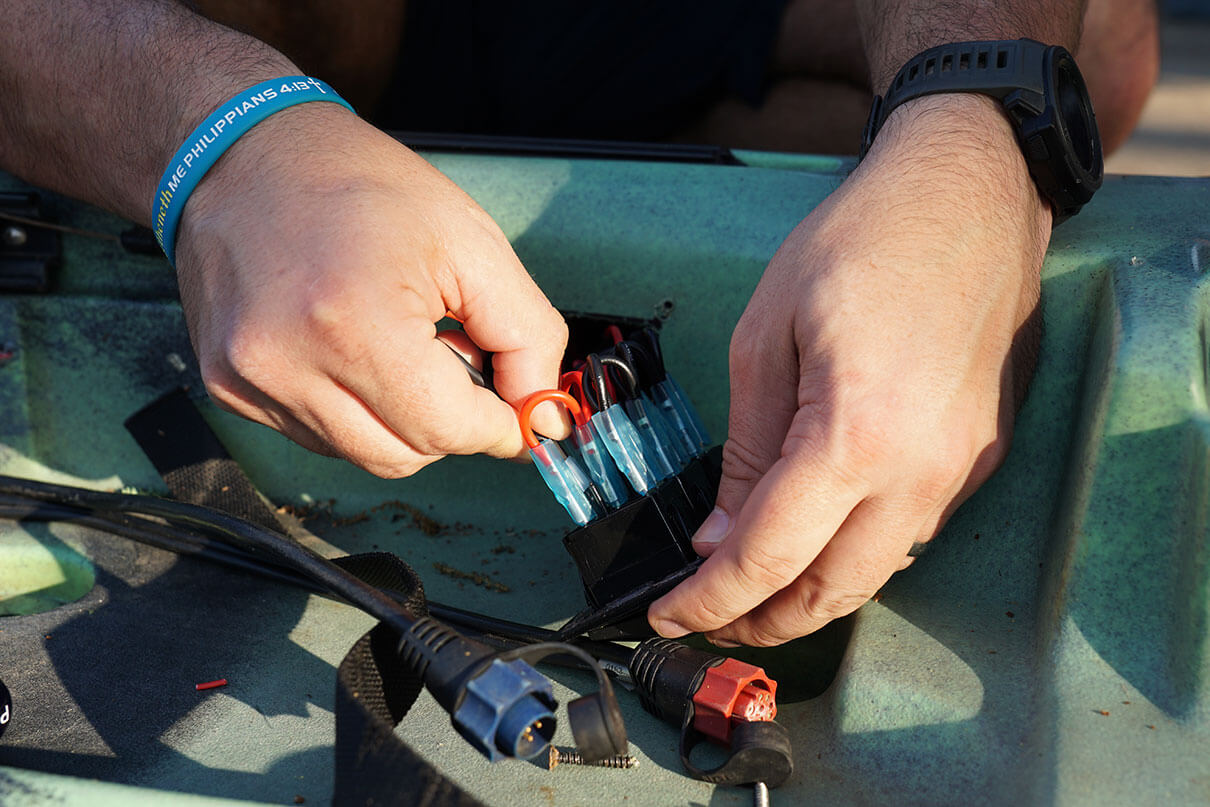
- Marine-grade butt connectors
- Shrink wrap
- Submersible green light
- Kayak flag with battery-operated light
- Marine-grade silicon
- Two-pin wire connector
- 12-gauge (AWG) wire
Putting It Together
1
Lay out the bow lights with red on the port and green on the starboard side of the bow.
2
Use the 1/16” drill bit to predrill fastener holes for the bow lights. Use the 1/8” drill bit to drill a hole for the wire.
3
Place the red light on the port side and the green on the starboard side.
4
Cut 12 AWG wire to reach from the battery to the lights.
5
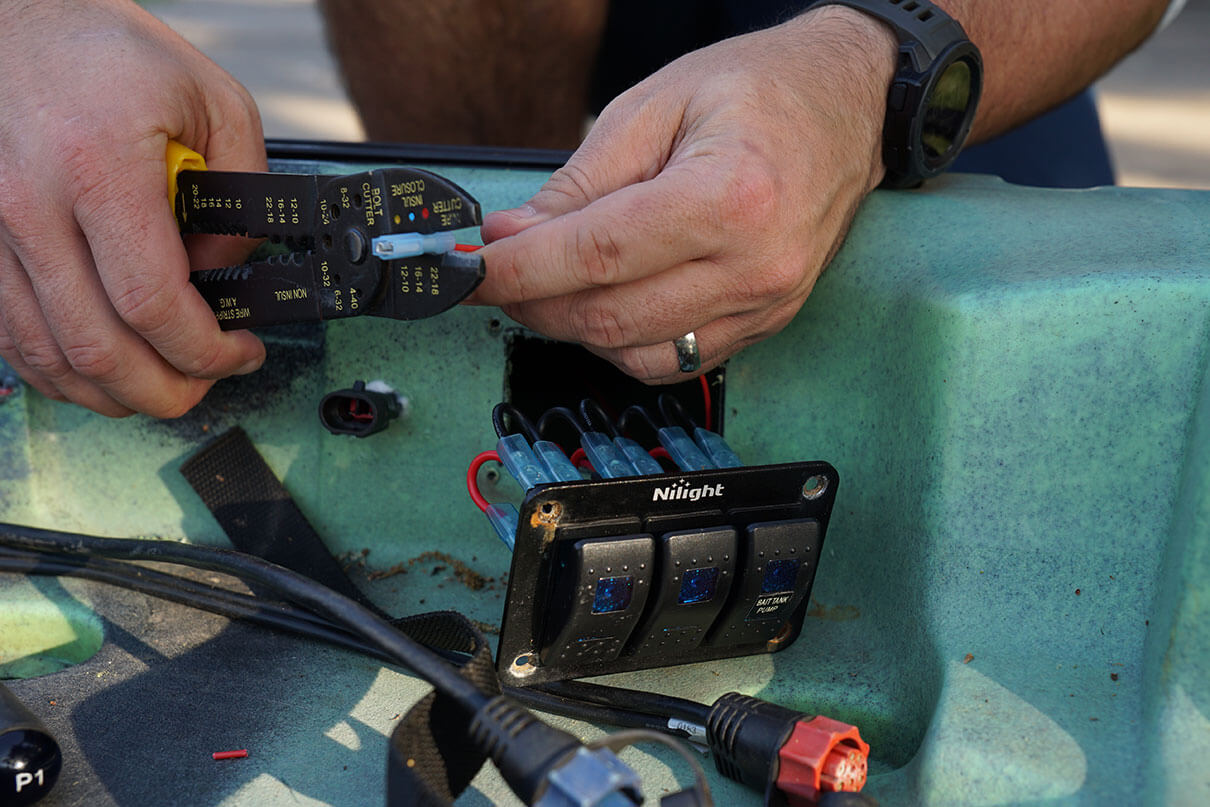
Connect the wires using heat-shrink butt connectors. Use a soldering iron to heat the shrink wrap and seal out water.
6
To provide light in the cockpit and storage well, use flexible LED strips. Red or blue lamps provide illumination without affecting night vision.
7
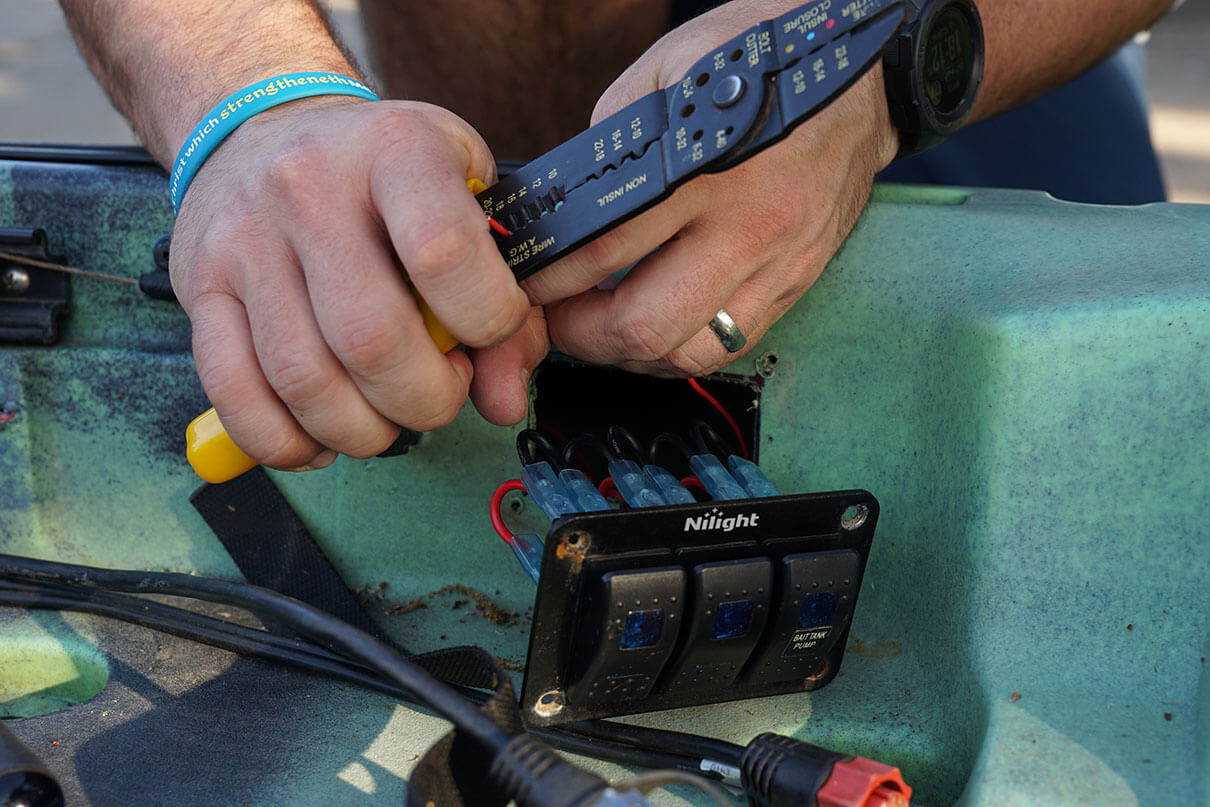
Connect the wires from the lights to the switch system. Run the wires from the switch to the battery. Red to positive and black to negative.
8
Seal the openings in the hull with marine-grade silicone.
Tip
After cutting flexible LED light tape, use solder to connect the power wire to the light strip. Cut the flexible tape at the “cut point” with a box cutter. Heat the solder point and apply a drop of solder. Then heat the end of the wire. Then return and heat the drop of solder. The solder will travel to the heated wire and secure it to the flexible light strip. After the solder cools, use heat shrink to protect the connection.
Cost
Adding lights was my most expensive DIY project. The navigation lights, anchor light, LED strip lights and submersible light cost $180. I used the best marine-grade LED lights and connectors. I already had a switch to run my livewell and I scrounged wire from previous projects to connect to the battery and switches.

Complete illumination the easy way. | Feature photo: Cory Byrnes


")

