After a speeding motorboat zoomed past my kayak in the pitch-black dark, I decided to add navigation and deck lights. First, the Coast Guard requires navigation and anchor lights on a motorized kayak. Second, a kayak is small and low to the water, so boaters have trouble seeing a kayaker, day or night. When I am motoring my kayak on cloudy days, early mornings, late evenings, and after dark, I want people to see me. To make safety a priority, I rigged my kayak with the required lights. And more.
How to Rig Your Kayak with the Required Safety Lights
The Plan
I knew I needed safety lights and spotlights. I decided to add red and green LED light strips to the bow. I also installed two LED spotlights on the bow deck. In the stern, I installed a white anchor light. I also carry a headlamp to see after dark and flag down help.
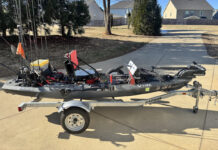
I started with my NuCanoe Frontier 12 propelled by an old Minn Kota 55-pound thrust trolling motor in the transom. The trolling motor is powered by a 35 amp-hour battery which has plenty of juice to run the lights, too.

1 The Drill
The most painful part of installing lights is drilling holes in my precious plastic kayak. If I make a mistake, fixing the problem requires carefully melting, filling and remolding the plastic.
Before making any permanent moves, I planned out the installation and laid out the components.
First, I checked for access and clearance behind the light or switch. Then, I sat in the kayak to place the switches within arm’s reach. I also measured out plenty of wire and set the lights and wires in the planned positions.
For the tightest fit to prevent water from entereing the hole, I match the size of the drill bit to the wire or bolt.
For the red and green LEDs, I drilled one hole along each side of the bow near the top. To install the LED pods on the bow deck, I drilled one hole for the bolt and a hole for the wire. Finally, I drilled two holes near the seat, one for each on-off switch.
Parts List
- A red and green boat navigation LED lighting strip kit
- 2 LED Light Bar Wiring Harness Kits
- Nilight 2pc LED Pods
- Marine grade butt splices
- A YakAttack VISICarbon Pro
- 12v deep cycle battery
Tools List
- Drill
- Drill bits
- Crimping tool
- Electrical tape
- Sockets and wrenches
- Heat gun
- Heat shrink tubing
- Crimps 16 and 14 gauge
2 Running Wires
The bow hatch on my NuCanoe Frontier 12 made it easier to run wires below deck. The lights came with wires long enough to reach the switches. The hardest part was getting the 10-foot-long wires from the switches to the front hatch. The easy fix was to push the wires through the switch hole and lift the back of the boat, which caused the wires to slide within reach of the front hatch.
I zip tied the wires together to keep them organized and relatively secure. The wiring kit was great because it came with almost everything I needed to get the job done and I didn’t have to add or cut any wires.
3 Splicing
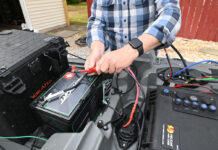
Once I had all the wires in place, I spliced them together. I was a little skeptical at first because I’m not an electrician. The process was straightforward: I matched the black light wire to the black switch wire and the red light wire to the red switch wire. I used pigtail connectors to attach the power leads to the battery. Then I crimped everything together with heat shrink crimps.
4 Powering Up
The 35 amp-hour battery running my electric trolling motor is powerful enough to handle the lights, too. I keep the battery secured in the front hatch with heavy duty Velcro. I haven’t had any issues with it moving or coming loose.
For a white anchor light, I attached a YakAttack VISICarbon Pro light to a gear track behind my seat. The light takes AA batteries, so I didn’t have to run more wires.
5 On the Water
Eager to test the lights in the dark, I took my kayak duck hunting. They worked flawlessly, and I was thankful to have the lights when I encountered a couple of big boats in the dark. The LED pods provided enough light to see where I was going, and the navigation lights made me visible to other boats.
With some planning, adding illumination is shockingly easy. | Feature photo: Dan Brown


Well written, but worthless without photos. = (
I came across a kayaker who carries a white handheld flare just in case he has power loss or it seems another boat is not seeing him. He said he’s had to use it once when he was out on the lake early in the AM and came across a 4’-5’ blanket of fog. He could hear a boat coming in his direction and despite the pole light being a few inches of the fog, they weren’t slowing. The flare lit up a “halo” around him that the boat noticed and slowed down in time. I carry a small air horn in addition to lighting but I do worry about people hearing it over their engine, especially with so many people wearing earbuds now days.
I have multiple kayaks and canoes also three boats and I think that kayaks and canoes should have some sort of blinking light ( blue or yellow) along with the required lights because boaters don’t know what the lights are from and could possibly get to close especially at night and cause big waves and make you flip over and nobody wants to see that happen
Well, besides dropping mentions of gear brands at every bend in a sentence, a good point to include would be that if you are going to rig your boat with the official pattern of running lights, you are sending a message to other knowledgeable, light-savvy boaters that you understand the Rules of the Road and that they can count on you to maneuver appropriately…Lights serve a purpose beyond merely indicating your presence…they infer you are a capable sailor who knows what s/he is doing…