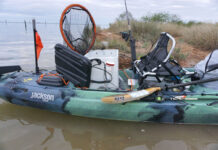
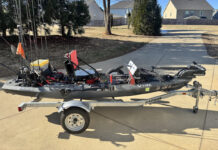
For 10 years I have dragged my fishing kayak through shallow oyster reefs on the Gulf Coast and edged it between partially submerged trees in Texas lakes. When I’m done fishing, I stack my kayak with my friend’s boat for the ride home. In short, my kayak lives a rough life and it shows. A new kayak isn’t in my budget, so I gave my old boat a little TLC. For less than $150, I spiffed up my old kayak for another decade of abuse.
Plastic Surgery: 4 Ways to Fix Up Your Old Kayak

1 Wash and Wax
To scrub my kayak’s hull clean, I used mild soap and a stiff-bristle brush. After I dried the kayak, I used a soft cloth to apply Back to Black plastic restorer. Once the wax dried to a haze, I buffed it off by hand with a soft cloth. You can also use a portable drill with a buffing wheel to speed up the process. The wash and wax left my kayak looking new. But I wasn’t done.
2 Shock Cord
After 10 years of exposure and abuse, it was time to replace the stretched-out shock cords on the hatches, tankwell and tackle box compartments.
First, I chose the appropriate size shock cord for each replacement. My kayak uses 3/8-inch shock cord on the hatches and 1/4-inch in the tankwell and tackle storage. Go with a marine grade shock cord designed to withstand sun and salt. Setting the shock cord to the correct length at each location is the most important thing. I did that by untying the old shock cord and laying it out. I then cut the new shock cord a few inches shorter. Remember you will use some of the length to tie the two ends together. To attach the ends, I used a double uni knot. Use a torch to melt the ends of the bungee to prevent fraying. Since I was already changing the bungees, I decided to add a pop of color with orange cord.
3 Musical Chairs
My seat was stained with reminders of good days on the water. To spruce up and modernize my seat, I ordered a replacement seat cover. Using the old frame, I pulled off the old seat cover and installed the new one. The new seat has more padding. It also exposed more of the frame. I can upgrade the new seat cover with storage bags and lumbar support. This was the biggest investment in my refurbishment, but the new seat cover made the kayak more comfortable. If a replacement cover is not available for your seat, wash the seat cover with soap and water and treat it with upholstery cleaner before reinstalling on the seat frame.
4 Keel Tape
What if I told you I can turn back time? While I’m not getting any younger, adding a keel guard to the bow and replacing the skid plate in the stern erased years of dragging and banging my kayak.
There are three options for keel guards: Kydex plastic sheets, Gator Guards and keel tape.
Of the three, Kydex is the least expensive and most difficult but most durable option. Start with flat sheets of thermoform plastic. Heat and mold the sheet to the keel. Then glue the plastic to the boat with with Amazing Goop 17011 Marine Adhesive.
Gator Guards’ KeelShield is available in sheets shaped and designed to fit a keel or patch plastic. Mold the KeelShield to the kayak keel with a heat gun. The adhesive is already applied and cures quickly. This is the most expensive option.
Keel tape is the middle-of-the-road option. Not as durable as the other options, keel tape is easy to apply and only costs $30 for a two-inch by 10-foot sheet. The tape has adhesive, but I added 170011 marine adhesive for a permanent install. For the best match, choose the vinyl PVC keel tape.
I first sanded the high ridges enough to provide a relatively flat spot to adhere the keel tape. Second, I washed my boat, paying particular attention to the area where I was going to apply the keel tape. The tape came with an alcohol-based prep wipe I used on the area. Then I applied a small amount of the marine adhesive before removing the backing of the tape and applying it to the keel. I started from the stern and worked to the bow while pushing out ripples. As I got to the bow, I applied a little heat to aid in conforming the keel tape to the narrowing bow. There were some ripples caused by the changing angles. After the keel tape set but before the marine adhesive cured, I made relief cuts so the tape lay completely flat.
Learn how to restore your kayak so it’s just like new. | Feature photo: Cory Byrnes


The Keel Tape section is incorrect – you show a “before” picture of the stern and an “after” picture of the bow ???