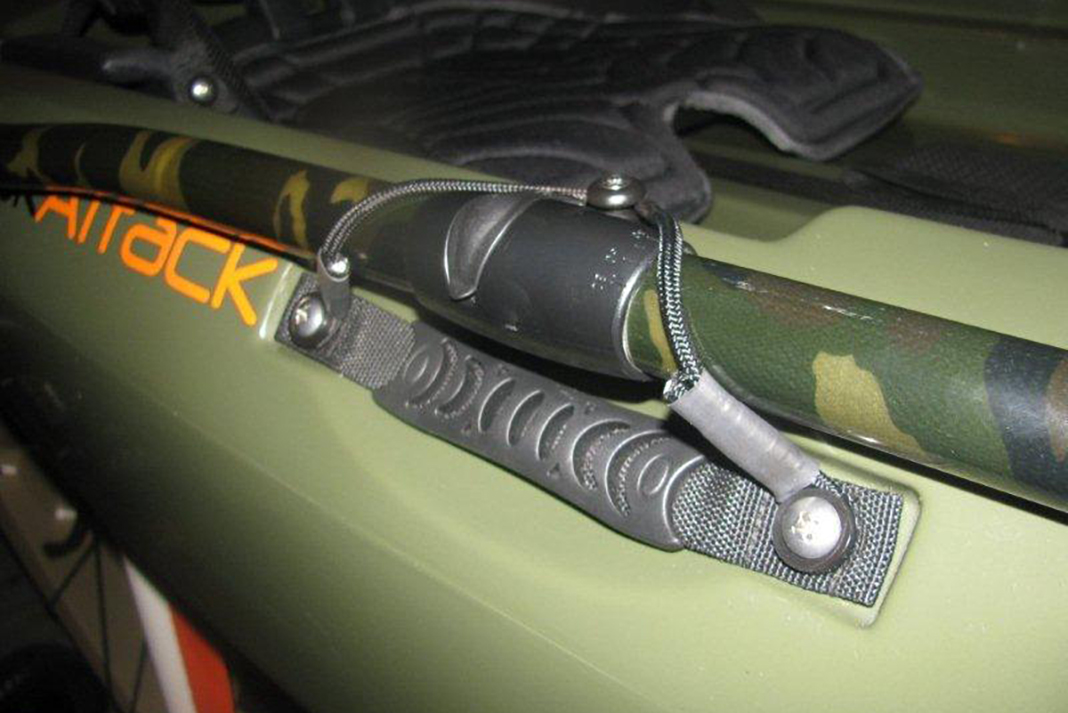
so I decided to add a second paddle keeper to my Wilderness Systems Ride 115. A factory paddle keeper was already installed on one side, but I wanted to add another DIY keeper so I could hold both my paddle and a YakAttack ParkNPole. Here is what I did to keep drilling to one hole.
Easy-Install One Hole DIY Paddle Keeper

1 Measure the kayak handle
First, I measured the distance between the two screws that hold the handle on. It measured 7.5 inches, however this will vary with different kayak models.

2 Build your bungee
I cut a piece of bungee approximately 11.5 inches in length, long enough so I could fold about two inches of each end over to make the loops.
Next, I used some electrical tape to temporarily hold the loops in place, then added thread to make the loops tighter. Finally, I used heat shrink tubing on each end to permanently secure the loops.
The finished product is a 7.5-inch piece of bungee with a looped end on each side.

3 Install your bungee over the handle
To install the bungee, I removed each handle screw one at a time and passed the screw through the loop. Then I held the loop facing up toward the cockpit and re-tightened the screw. Holding the loops up toward the cockpit makes it easier to bring over the paddle shaft.

Using my drill, I added a bungee button that I purchased at HOOK1 on the rail of the cockpit with a well-nut, however I would recommend a nut and washer if you have access to the inside.
Finally, I added a small piece of non-slip traction padding (e.g. Silent Traction) to silence the resting paddle. I am very happy with the finished product and it works great for my needs.
Tight lines!
Here’s what your DIY paddle keeper will look like when it’s done. | Feature photo: Bill Sikora


