My parents have a faded Polaroid of me, at two years old, holding my first catch. I can’t remember a time when I didn’t lust after a watery adversary. But millions of people still haven’t taken the plunge, and the biggest obstacle for many is knowledge. Knots, rigs, tackle, gear, pedals, paddles and more—the learning curve can seem intimidating. Never fear, because here’s your cheat sheet to kayak fishing mastery, with 24 topics covering the angling arts from top to bottom.
24 Steps to Kayak Fishing Mastery
1 To Fish Or Not To Fish
Whether you’re reading this on the couch, barstool or porcelain throne, you’re asking the question, “Is fishing the right hobby for me?” The short answer is yes. Fishing is for everyone. From Type A to Type B, introvert or extrovert, casual to madly obsessed, there is a fishing for you. Fish live everywhere. There is a kayak for every type of fishing.
Okay, it’s not cheap. But fishing is unique because the amount of stoke does not correspond to the amount of money you spend. There are people who spend millions of dollars to go fishing and guys who push the limits on a couple bucks. When a fish is on the line, the feeling is the same. No excuses—fishing is right for you.
2 Tackle
Visit an old salt’s man cave and you’ll see rows of rods and reels, stacks of tackle boxes, miles of fishing line, nets, stringers and other flotsam littering the floor, work bench, shelves and hanging from the rafters. The average old-timer has enough tackle to fund a small army. But I guarantee he relies on a handful of rods and rigs.

Kayak anglers use the same rods, reels and rigs as any angler. I would recommend purchasing the highest quality tackle you can afford, it will take a beating. But strategically purchasing the right stuff will save on the initial investment.
Your local tackle shop is the best resource. More than once, I have seen a new angler drop a pile of tackle on the counter only to have the guy at the register push half the stuff aside and sell the new customer what he actually needs. Seems counterintuitive, but the shop owner understands it’s more beneficial to have his customers rigged right and catching fish than slinging the wrong stuff and getting skunked. The guy at the register knows you’ll be back for more.
3 Kayak
This is the best time in history to buy a fishing kayak. After years of research and development, there is a kayak for every type of fishing. Inshore, offshore, flat water, backwater, fresh, salt, river, lake, ocean—if it’s wet, there’s a kayak designed to meet the conditions.
The abundance of brands and models makes it more difficult to find the right ride. Your local paddle shop is the best resource. The staff has sold boats to paddlers of all abilities and ambitions. Many shops keep a fishing pro on staff. Most paddle shops sponsor a demo day where you can kick the tires and talk fishing. They’ll even lend demo boats or take a prospective paddler for a test drive.

Don’t have a local paddle shop? Find regional pro staff fishing for the your favorite kayak manufacturer. These guys and gals are all over social media. Or visit your favorite brand’s website. Most companies host social media and message boards to find like-minded anglers.
4 Short Answers
Pedal or Paddle?
Pedals are easier to operate and offer hands-free fishing but lines can tangle around lower unit and pedal drive. Paddles are more maneuverable and reliable. Paddling takes more effort.
Long or Short?
Longer kayaks go farther faster. Shorter kayaks are more maneuverable.
Wide or Narrow?
Wider beam equals greater stability. Narrow profile will go faster, straighter.
Sit-on-top or Sit-inside?
Sit-on-top offers more options for rigging and easier to enter and exit. Sit-inside provides protection from the elements. Sit-insides carry more gear inside. They are lighter and generally have faster hull designs.
Frame Seat or Low-Profile?
Frame seat is more comfortable, easier to stand up with adjustable seating positions. Low-profile, wind resistant and encourages a more aggressive paddling position.
Motor Power?
Modern motor options are light, reliable, easy to install and powerful. A trolling motor running off a 12-volt marine battery will add significant weight. Smaller, lighter lithium-ion batteries will add significant cost. Remember, a motorized kayak may have to be registered with state agencies.
5 How It’s Made
Rotomolded
A metal mold is filled with plastic pellets, then heated and spun. Tough to damage and easy to repair.
Thermoformed
Sheets of plastic are heated then pressed into shape. The material is lighter and more hydrodynamic.
6 Paddle Leash
Attaching your paddle to the kayak with a tether could cause problems. First, it adds weight to the paddle and impedes the paddle stroke. There’s no reason to use a leash when you are holding the paddle. If the kayak flips, the leash could tangle making it harder to reenter the boat. Instead of leashing the paddle to the kayak, it’s better to carry a backup set of blades.
7 Life Vest
A life vest only works if you’re wearing it. You’re only going to wear a life vest if it’s comfortable. Look for soft, form fitting foam. The flotation on the back should be high on the shoulders to accommodate a sit-on-top high seat back. Adjust the life vest so it fits snugly and won’t ride up in the water.

Pockets on the front hold safety gear like whistle, signal strobe, personal locator beacon, safety knife, VHF marine radio and smartphone. Tackle storage isn’t as important unless you plan on leaving the kayak to wade and fish.
8 Leashes and Floats
To keep the rod in the kayak, use a rod leash. The downside is the leash will make it harder to work the rod and could become tangled in the event the kayak flips over. Detach the rod leash when the rod is in your hands.
If the rod goes overboard, a pool noodle zip-tied above the reel will keep it floating. A float adds weight to the rod and could affect its action.
When paddling in rough water, secure the rods to the vertical rod holders in your crate with a bungee cord or, if possible, place the rods inside the kayak.
9 Pick your Paddle
Choose the lightest, stiffest paddle you can afford. Every ounce and any flex will sap power. An adjustable length shaft makes it easier to dial in the paddle shaft length for a perfect stroke. Wide, high-angle blades provide more power for a kayak with a high seat. Longer, narrower blades are less tiring for long trips.
10 Transportation and Storage
How are you going to move it? Where are you going to keep it? Fishing kayaks are big and heavy and they require some special care. Inflatable kayaks are easier to store and transport, but they are harder to paddle or pedal. Plastic kayaks should be stored on their side to prevent the plastic warping. It’s best to loosely cover the kayak with a tarp to prevent the color from fading and staining.

Save your back and your keel by using a cart to move the kayak. Be sure to match the cart’s weight limit to the kayak. The best automobile to transport a kayak is in a pickup truck with a bed extender. The next best set of wheels is a kayak trailer. Car-topping is the last resort. Roof racks can be rigged with lift assist bars and saddles with rollers help slide the boat.
To load the kayak on a roof rack, first place the kayak next to the car parallel to the roof. Lift the bow onto the racks. Then lift the stern. Be sure to strap the kayak to the rack, not the saddles. It’s best to transport the kayak upright so you can leave the seat and crate secured in the boat.
At the boat launch, load the kayak onto the cart. Then, use totes to move gear from the car to the kayak. Once the boat is rigged, roll it to the launch. Unload the kayak to the side of the launch and return the cart to the car.
11 All Aboard
The most precarious moment comes when it’s time to get into and out of the kayak. Don’t worry, gravity is your friend.
If you have a high-low seat, be sure the seat is in the low position. If you are entering from shore, drag the kayak into the water bow first. Turn the kayak so it is parallel to the shoreline. Standing on the shallow side, reach behind you and steady the boat. Carefully sit down on the seat, keeping your center of gravity over the center of the boat, then swing your legs into the cockpit.
To get out of the kayak, reverse the process. Turn the kayak so it is parallel to the shore. Swing your feet out of the boat and plant them on the bottom. Hold the kayak and lean forward to stand up.

To enter the kayak from a dock put on a clown costume and prepare for a circus act, this maneuver takes balance and timing. Pull the kayak parallel to the dock. The key is keeping your center of gravity over the center of the kayak.
If the dock has a ladder, you’re lucky. If not, roll over on your belly and hang your legs over the side of the dock. Put one foot in the center of the boat. Hold onto the dock to keep the boat steady. Lower your second foot to the deck of the kayak, still holding onto to the dock. Steady the kayak to keep it from sliding out. Put one foot in each footwell. When balance is achieved, let go of the dock and drop into the seat. Wave to the crowd.
12 Rod Holders Explained
Flush mount
Toughest and most stable rod holder. Best for drifting or trolling. Angle 45 degrees from the centerline to spread out the lines.
Rod Tubes
Keep the reel out of the water. Good for storing the rod. Will secure the rod for light drifting or trolling with light drag.

Adjustable
Point the rod in any direction and keep the reel high off the water. Makes it more difficult to remove the rod from the holder and could snag lines.
Vertical
Rod holders on crates or livewells for transporting the rod between fishing spots.
13 Pedal Lesson
Pedaling a kayak seems simpler than paddling, but it presents some challenges. First, a propeller or flippers draw more water than a paddle. Remain aware of the water depth and raise the lower unit and rudder before striking bottom. The lower unit improves stability and tracking by hanging below the boat like a sailboat keel. It also cuts down on hydrodynamics, so pull the propeller or fins up before paddling for any distance.

A rudder will turn the boat in a wide arc. Pedaling while turning the rudder widens the arc. For sharper turns, stop pedaling while the boat turns or drop a paddle blade into the water.
14 Paddle Lesson
Paddling a kayak is a simple as riding a bike; after a few unsteady strokes you’ll be off to the races. Hold the paddle with your hands shoulder-width apart. For the most efficient stroke, keep the paddle shaft as low as possible and the blades close to the kayak.
Start with the logo on the blade and the spoon of the blade facing you. Adjust the paddle shaft so the blades enter the water close to the boat without having to lean or twist to reach the water. Dip the blade without submerging too much of the shaft. Adjust the drip guards so they do not go into the water.

To turn the kayak, make extra strokes on the opposite side of the kayak from the direction you want to turn. For a sharper turn, make a wider stroke. For a slight turn, to correct direction, angle the paddle blade 45 degrees to the side of the boat and pull towards the kayak on the stroke. Dragging the blade will turn the kayak, but also sap speed. To spin or reverse, turn the kayak blade so the logo is facing away from you.
15 Rigging Right
Adding rod holders, cup holders, gear tracks, camera mounts and electronics is at the discretion of each angler. Before going overboard with accessories, consider that each ounce you add to the kayak is extra weight you will have to move on the water.

Also, a kayak bristling with gear and gadgets will be harder to enter and exit. Will gear get in the way of fishing? Be sure accessories do not impede righting the kayak and reentering if you fall out.
16 Anchor Aweigh
Anchoring the kayak is one of the most precarious maneuvers. To anchor the kayak in moving water, the line must be secured to the bow or stern of the boat. Anchor from the side and the boat will flip over and possibly become pinned below the water.
To anchor or stakeout in current, rig the kayak with an anchor trolley. In sand or soft bottom, use a grapple anchor with a short piece of chain. To anchor in a river with rocky bottom, deploy an arm’s length of heavy chain that will snag in the rocks.
In case of an emergency, attach a float to the rope so you can break away from the anchor and return to retrieve it. Anchor rope should be at least three times as long as the water depth.
5 Steps to Anchor Your Kayak
- Clear the anchor line so it lies loosely and untangled on the deck. Pull the anchor trolley clip within reach.
- Paddle up current from the location. Turn the boat so it is pointing the direction you want to fish.
- Drop the anchor to the bottom, let out enough rope to equal twice the water depth, clip the float to the line, then clip the line in the anchor trolley. If the anchor does not hold, let out more rope.
- Shimmy the trolley line to move the anchor rope to the bow or stern. Secure the rope to a cleat. Be sure the rope can be quickly released if the boat should get caught in the current or become unstable.
- Retrieve the anchor by first pulling in line with the anchor still running from the bow. When you reach the float, pull in the anchor trolley and unclip the float, continue to pull in the anchor. If the anchor is stuck, attach the float to the line and paddle above the anchor and attempt to pull the anchor again. Avoid turning the kayak sideways to the current.
17 Fishing Skills
In many ways, kayak fishing is the same as fishing from a boat or the shore. The same tackle and techniques work, but a few tips will improve success.

Casting
Fishing works better when you’re standing. If you can’t stand in the kayak, try to kneel in the cockpit or sit on a crate in the tankwell. Set a high-low seat to the high position. Keep the rod tip high when working a lure or rig. Always check behind you for a clear back cast. Place rods in the crate on the opposite side of your casting arm.
Retrieving a lure, especially large lures, will cause the kayak to move towards the lure. When fishing with big plugs, Alabama rigs and other heavy tackle, anchor or stake out the kayak so the force of the retrieve doesn’t move the kayak.
Jigging
To properly work a vertical jig, the rod tip must rise and fall quickly. To improve the angle, kneel in the kayak or stand up.
Drifting
Each kayak drifts differently. Some boats will drift with the stern into the current while other boats drift side-to. Change the angle and speed of your drift by dropping a leg into the water. A drift sock, run through the anchor trolley, will further slow or change the drift.

Trolling
A kayak’s average speed is around three miles per-hour, perfect for slow trolling. Pedal anglers have the advantage of pedaling with their feet while working the lines with their hands. Paddlers should bring the kayak up to speed, cast the lure or bait away from the kayak, then continue to paddle.
Bait
Cut bait can be stored in a small cooler with an ice pack. Live bait will survive in a livewell, but the tank will add weight and take up space in the kayak. A bait bucket or tube is a good alternative, but it will severely affect the boat’s performance. It’s best to pull the bait bucket into the boat before paddling long distance.
18 The Catch
Hooking A Fish
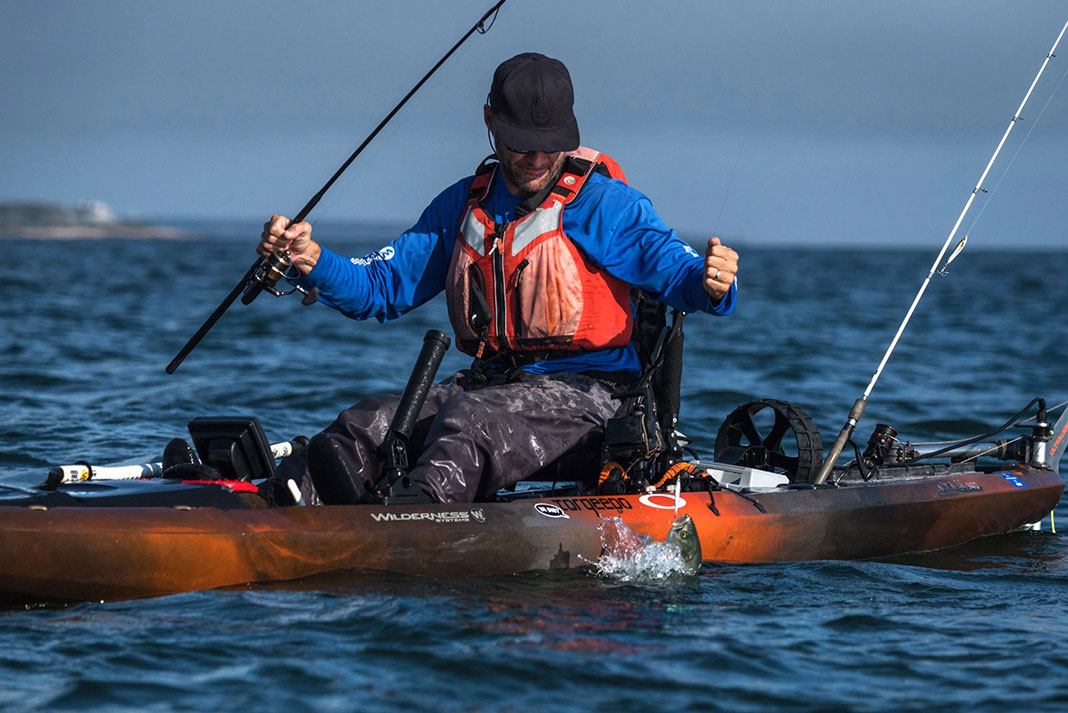
Hours and hours of preparation and anticipation come down to a split second when a fish finally bites the hook. The kayak is moving so set the hook hard. Increase the drag to improve the hook set.

19 The Fight
The Sleigh Ride
A small fish will pull a kayak at surprising speed. Watch out, the fish will most likely run for cover dragging you into trees, docks, rocks and rapids. Pedal anglers with reverse can back out of a problem. Pedal anglers without reverse should fish with the bow facing away from trouble.
Use the rod to add drag pressure to the fish and control the kayak. If the fish runs left, hold the rod on the right side of the boat to bring the bow around and follow the fish. When the fish dives deep, lift the rod high. To control the fight, keep the line short to position the kayak overtop the fish.
20 Grip and Grin
To take a photo of your catch, start with the sun at your back. Attach a sports camera to front of the cockpit and use a remote or phone app to snap photos.

If a buddy is taking the picture, have him pull along side your kayak with his bow facing the opposite direction. Fill the lens frame with the fish. To add a few pounds to your catch, hold the fish away from your body and closer to the camera.
21 Landing
Take a wrap on the line and swing a smaller fish into the kayak. For larger animals, drop your leg into the water and lift the fish when it is alongside the boat. Once the fish is in the kayak, keep it from jumping out by covering it with your legs. If the fish has spines and teeth or the lure has extra hooks, clear the deck of your body parts and use a rag to cover the fish’s head.

Offshore anglers prefer a spear-like kage gaff to control large, toothy critters. Lip grippers work great to control the fish when it’s in the boat, but grabbing the lip can be cumbersome when the fish is thrashing at the side of the boat.
A landing net will scoop up the fish and control it in the boat, but the hoop takes up space in the kayak and the net seems to tangle on everything.
22 Measure and Release
Control the fish with a lip gripper. Use a measuring board for an accurate measurement. Avoid holding the fish out of the water more than a few seconds. Keep it wet with a damp cloth. Never touch the gills.
23 Keepers
Storing your catch can be more trouble than it’s worth. Ideally, the fish should be chilled to just above freezing, but carrying a cooler will sacrifice space and weight. A soft-sided cooler or cooler bag is lighter and easier to fit in the boat. Leaving the fish inside the kayak is like cooking it in a plastic oven.

Fish hanging on a stringer attached to the anchor trolley will stay alive for a while, but the drag will affect the boat’s performance. Some anglers keep smaller fish alive in a live well, but that adds weight and takes up space. Cleaning the fish on the water would make it easy to store fillets in a small cooler, but this could violate fisheries regulations.
24 Living The Lifestyle
Once you’ve got your kayak and tackle, it’s time to connect with other kayak anglers. Fishing offers something for everyone. If you’re a lone wolf, kayak fishing offers the best opportunity to get away from it all and strike out solo on the water. If you like to run with the pack, groups and events make it possible to join like-minded outdoorsmen on and off the water. Fishing with a group is safer and more productive than fishing alone.

Network with other anglers to discover new opportunities and productive techniques. Watch out for each other on the water, monitor weather and keep a headcount. Groups and clubs are great for sharing information and organizing outings, but the biggest benefit comes when advocating for issues we care about. Power is in numbers; social media, tournaments and fishing clubs are the soil that seeds grass roots movements. A kayak may only have one seat, but kayak anglers are not alone on the water.
Test the limits of your skills as you seek kayak fishing mastery. | Feature photo: Dustin Doskocil


