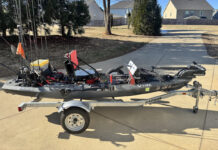
Kayak fishing doesn’t come cheap, but a solid and functional kayak beach cart doesn’t need to be as expensive as the rest of your hard-earned equipment. Sure, you can buy one out of the box and slap it together, but as shown below, its easy, cheap and fun to build yourself a cart that can bear your personal touch.
Lighten the load with a kayak beach cart
One day last summer I had a brutal low-tide launch, struggling to get my loaded kayak down to the water for some striper fishing. Then I watched in envy as one of the other anglers easily crossed the sand using a scupper cart made with WheelEez inflatable tires.
I eventually got my kayak and gear to the water (thanks Mike B. for the help), but I was drenched with sweat and felt vaguely nauseous. I decided that I wasn’t going to be “that guy” again.
Recently I bought a set of 42 cm WheelEez beach wheels with ¾” bearings (the “not cheap” part of the project) and built my own custom scupper cart to fit my Old Town Predator XL Minn Kota. It is rugged and should work great on the beach next time the tide is low.

Materials Needed for a DIY Kayak Beach Cart
- 42 cm inflatable WheelEez Wheels
- 36” length of ¾” OD tube steel, for the axle
- 1 pint of PVC cleaner
- 1 pint of PVC glue
- 5’ of ¾” Schedule 40 PVC pipe
- (4) ¾” PVC “T” fittings, one set for the axle and one set for the cross-bar to keep the kayak off the wheels
- (2) 3/16” × 1 ½” linchpins, to hold wheels on axle
- (4) ¾” stainless steel washers, for each side of each wheel
How to Build Your Own Kayak Beach Cart
1 Measure twice, cut once
Once you have all the necessary materials, measure and cut the lengths of PVC pipe based on the size of your kayak and the width of the scupper holes. Test these specifications on your boat and make any adjustments necessary before cutting. After cutting, conduct a dry-fit test with all the pieces to ensure the uprights of the cart will fit into your scupper holes.

2 Assemble the PVC frame
Glue the PVC pipe segments and the “T” fittings together as illustrated below. Apply PVC cleaner to the outside of the pipe and the inside of the pipe fitting where the two will be joined. Wait several seconds before applying the PVC glue in the same manner, then insert the pipe snugly into the fitting and hold firmly until the cement has set. See the instructions printed with these products for more details, and don’t forget to protect your lungs from the solvent fumes.

3 Prepare for the linchpins
Drill holes for the linchpins in each end of the steel axle, about a half-inch from the end. Use a 3/16” metal bit and make sure you drill through both sides of the tube in a single pass, so the holes are properly aligned to receive the linchpin. Use lower drilling speeds and make sure you don’t let the steel heat up, or it will become work-hardened. Go slow, use steady pressure, and if you find the going is tough consider using a dollop of cutting paste or another drilling lubricant. Another technique is to drill your hole with a smaller bit first and then gradually enlarge it with larger bits.

4 Assemble the wheels
Assemble your beach wheels according to the instructions provided by the manufacturer.
5 Bring it all together
Insert the steel axle into the PVC frame and feed it through until the axle is centered. Slide a stainless steel washer onto each side of the axle, then a wheel, and then another washer—this will allow free rotation of the wheels with no rubbing. Finally, lock the linchpins into either end of the axle and go hit the beach!

In the future, I may reinforce the upright sections of PVC just in case the cart gets hung up on an obstruction.
(Editor’s Note: The photo in Step 3 is shown without the ¾” washers installed to keep the wheel from rubbing on the pin).
A solid and functional kayak beach cart doesn’t have to cost you an arm and a leg. | Feature photo: Tim Moore


