Upgrading your fishing kayak seat has been made pretty easy with a variety of after-market options available, but for those who may limited options because of older style kayaks a DIY seat does not have to be onerous.
Sit In Style: DIY Kayak Seat Upgrade
Before we get started, this is not aimed at aftermarket kayak seat manufacturers or to take away any of their sales. This is an option for folks like me that want to rid themselves of monkey butt with an older style kayak.
There are some incredible seating systems out there on the market today with all the major manufactures stepping up their games. Wilderness Systems Phase 3 Air Pro and Air Max, Jackson Kayaks Elite Seat 3.0, and Hobie’s Vantage CT Seating, to name a few. A small portion of those are backwards compatible. Most are in the $300 range and worth every penny in my personal opinion. So if you’re in the market and can make the upgrade in seat or new kayak that is your best option.
Sit-on-top kayaks by nature involve getting wet. I spend 6–8 hours on average per outing. That’s a long time to have a wet backside and it becomes very uncomfortable. The issue arises when water pools in the seating area and gets trapped there. I have a 2010/2011 Wilderness Systems Ride 135 which does not have the Phase 3 system nor is it backwards/forwards compatible.
I have had the Ride for about 4 years and love it. During that time I have been using a Surf To Summit Pro Angler seat which is incredibly comfortable. But the seat has no bearing on the water getting trapped. After seeing the new seating systems, but being unable to upgrade, I started looking for alternatives. I consider myself to be a pretty creative individual and spent twelve years in the welding industry. That background first led me to consider buying one of the new seats and altering it to fit. But based on the measurements and the amount of unknowns involved, $300 was an expensive experiment with no guarantee of success.
During this same time frame a couple of my friends had modified their older Hobie Outbacks with some simple seating that eliminated the wet backside. One was with an old plastic school chair mounted to a couple of boards that he just sits in the seating area. It is not secured to the yak depending on his weight to keep it in place. The other was a common bass-style seat with a swivel bracket mounted to some framing. This system was made to mount into the Hobie and be easily removed when needed. I decided to do a combination of the two for my Ride.
Getting down to DIYing
I took measurements of the Ride’s seating area to insure that any seat I decided to use would fit inside that location. I didn’t want anything to wide that would require bringing the seat height up too far. The seat height is an extremely important consideration as it will completely change the overall balance of the boat.
If you get your kayaks vertical point of balance to high it will make it roll over much easier. The Wilderness System Ride 135 is an extremely stable boat. This allowed me a little more leeway in seat selection and ride height. My overall seat height came up about 6”. This made a dramatic change in the overall comfort level that gets very close to the Wilderness Systems Phase 3 seat.
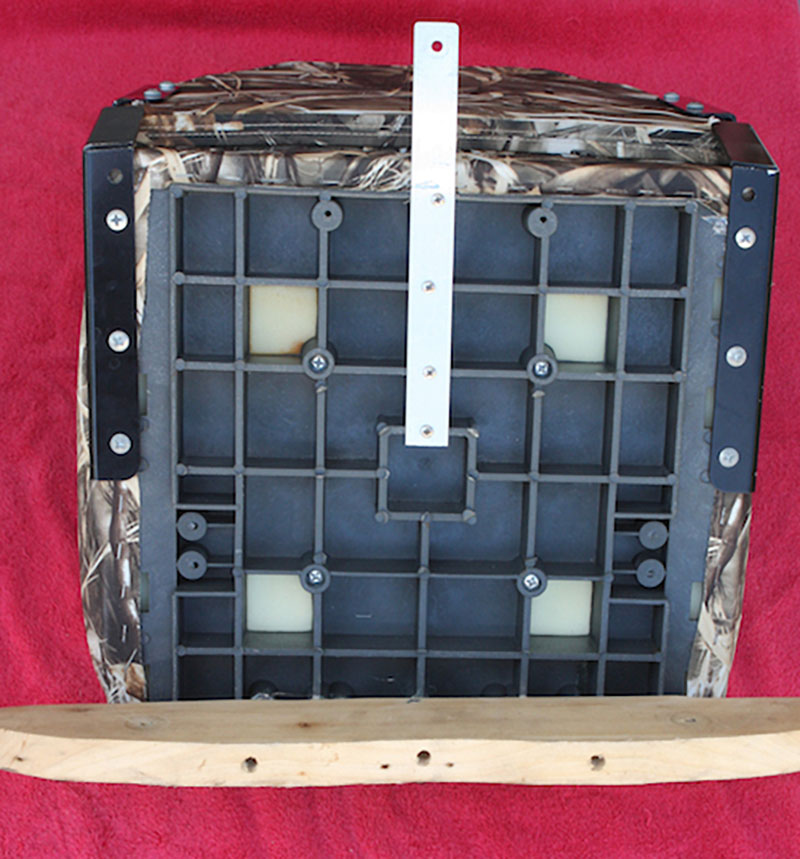
I started with a basic style bass boat seat. I got the seat from Gander Mountain at roughly $50. Other materials were 1 ¼ × 3/16 aluminum flat stock. ¼-inch stainless bolts with flat washers and lock nuts for the front brackets. I used wing nuts for the seat mounts. All of the hardware was found at Home Depot. I first removed all of the factory seating equipment. I then put the yak out in the yard and set the seat in place. I used wood boards to adjust the front seat height until I had it where I wanted it.
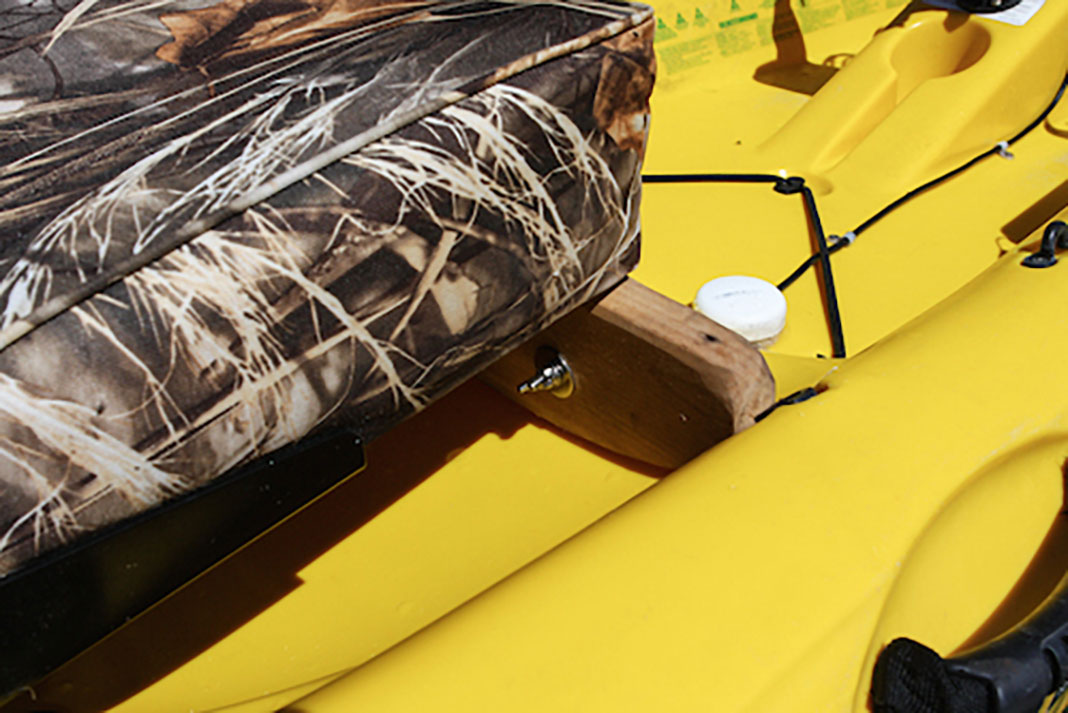
After getting that measurement I set the board sideways across the top edge of the kayak. Leave the board to be used long enough to do this. You will cut it to size later. I then use a tracing technique that I learned doing stereo installs. Starting at the lowest point in the yak, trace the contour of the floor onto the board as seen in the pictures. I used a 1 ¼ × 4 piece of fir for mine.
Trim the board as needed. I used a saw for the large sections and then a sander to fine tune it. You want the board to fit as closely as possible to spread the load more evenly. Kayaks are plastic after all with the original engineering designs supporting your weight over a much greater area. Once the board is fitted to the floor then it is mounted to the seat.
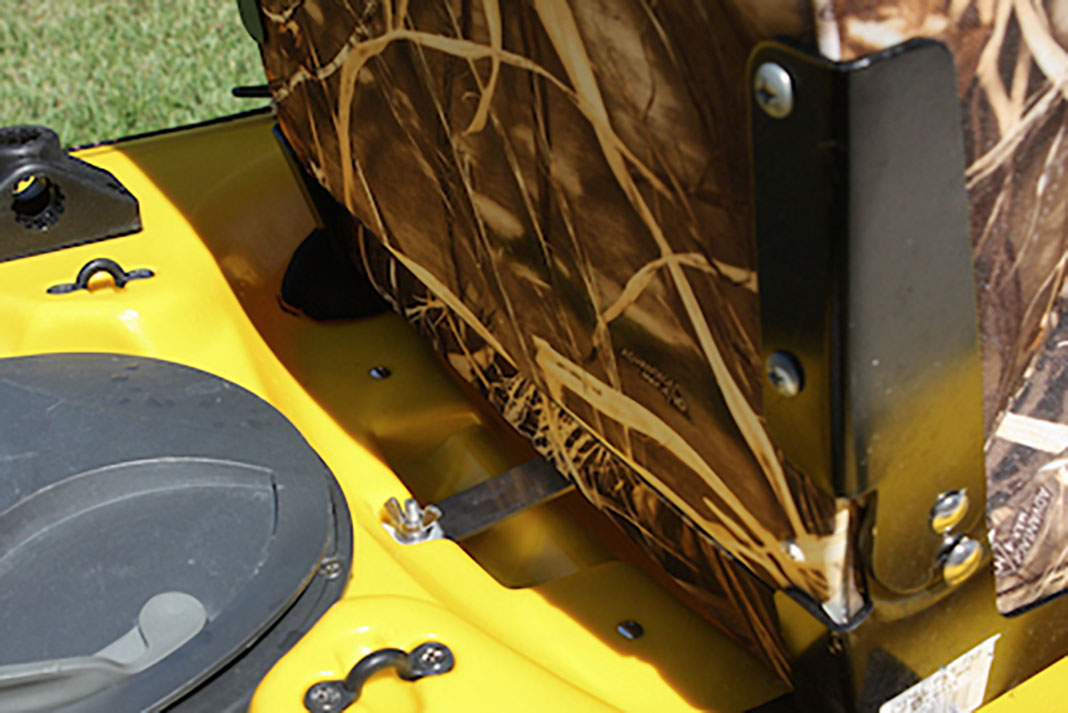
I did put some water sealer on the board before attaching it to the seat. I wanted the seat to be removable for ease of transportation. Using the flat stock aluminum I made the front angle brackets and the rear tab. I mounted the rear tab to the bottom of the seat which then connects to the existing factory seat mounting hole. This particular seat had metal brackets at the rear where the back of the seat mounts. I used pieces from the factory seat to pad the kayak floor to avoid damage.
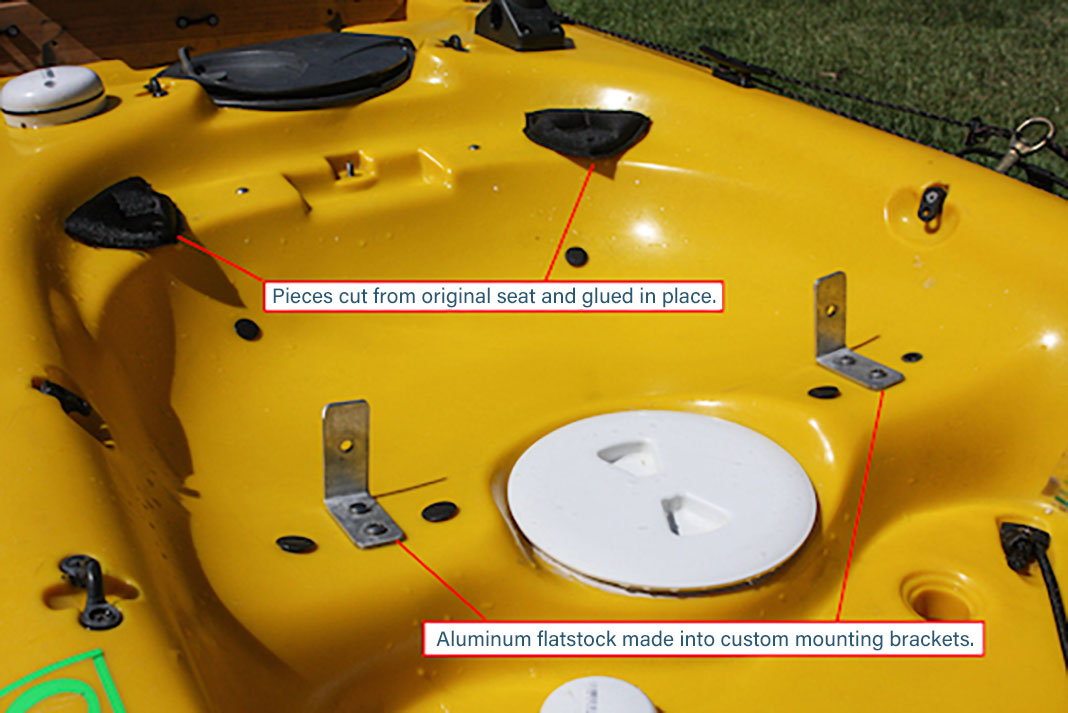
With the rear tab mounted and the seat in place I then mounted the front brackets to the floor of the kayak. All holes are sealed with Marine Goop. The seat then just drops in place with three bolts securing it to the kayak. The only post installation adjustment I have made was to the seat back. I unbolted it and lowered it as far as I could (about four inches) to allow better access to the rear hatch. With that in mind I would recommend purchasing a seat with a lower back. I also added a couple of plastic pad eyes that I clip my fish grips and pliers to. Then, they tuck under the seat and don’t clutter up my deck space.
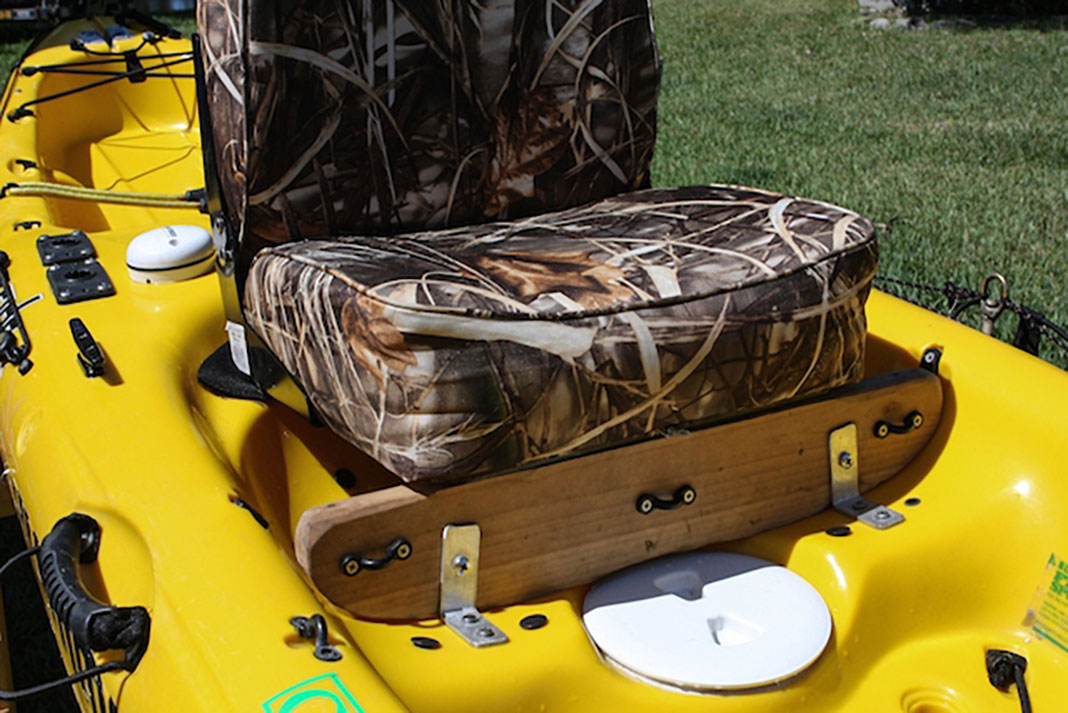
This was a simple and straight forward process that anyone with some basic tools and skills can accomplish. The idea can be applied to almost any kayak. The possibilities are only limited by your imagination and or skill set. I now have a custom up-seated Ride 135 for well under $100 with no more numb butt.
A raised DIY kayak seat for under $100. | Feature photo: Darin O’Brien





This is a very cool little project!